Customizing the layout in Android Studio, and a simple click handler.

This post continues from https://varanasisoftwarejunction.blogspot.com/2021/01/colors-in-android-studio.html.


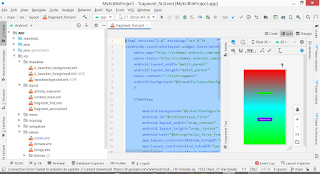
Open the fragment_first.xml in Android Studio.

<?xml version="1.0" encoding="utf-8"?>

<androidx.constraintlayout.widget.ConstraintLayout xmlns:android="http://schemas.android.com/apk/res/android"

    xmlns:app="http://schemas.android.com/apk/res-auto"

    xmlns:tools="http://schemas.android.com/tools"

    android:layout_width="match_parent"

    android:layout_height="match_parent"

    tools:context=".FirstFragment"

    android:background="@drawable/layoutbackground"

    >


    <TextView


        android:background="@color/textbgcolor"

        android:id="@+id/textview_first"

        android:layout_width="wrap_content"

        android:layout_height="wrap_content"

        android:text="@string/hello_first_fragment"

        app:layout_constraintBottom_toTopOf="@id/button_first"

        app:layout_constraintEnd_toEndOf="parent"

        app:layout_constraintStart_toStartOf="parent"

        app:layout_constraintTop_toTopOf="parent" />


    <Button

        android:id="@+id/button_first"

        android:layout_width="wrap_content"

        android:layout_height="wrap_content"

        android:text="@string/next"

        app:layout_constraintBottom_toBottomOf="parent"

        app:layout_constraintEnd_toEndOf="parent"

        app:layout_constraintStart_toStartOf="parent"

        app:layout_constraintTop_toBottomOf="@id/textview_first" />

</androidx.constraintlayout.widget.ConstraintLayout>


Varanasi Software Junction: Android Studio Layout

Click the design button

Varanasi Software Junction: Android Studio Layout

And change its parameters in the properties view. 

 <TextView

        android:id="@+id/textview_first"
        android:layout_width="wrap_content"
        android:layout_height="wrap_content"
        android:background="@color/textbgcolor"
        android:text="@string/hello_first_fragment"
        app:layout_constraintBottom_toTopOf="@id/button_first"
        app:layout_constraintEnd_toEndOf="parent"
        app:layout_constraintStart_toStartOf="parent"
        app:layout_constraintTop_toTopOf="parent" />


Next, place two buttons in the layout and adjust.
This video shows how.

Here is the layout after placement of the buttons


<?xml version="1.0" encoding="utf-8"?>
<androidx.constraintlayout.widget.ConstraintLayout xmlns:android="http://schemas.android.com/apk/res/android"
    xmlns:app="http://schemas.android.com/apk/res-auto"
    xmlns:tools="http://schemas.android.com/tools"
    android:layout_width="match_parent"
    android:layout_height="match_parent"
    android:background="@drawable/layoutbackground"
    tools:context=".FirstFragment">

    <TextView

        android:id="@+id/textview_first"
        android:layout_width="wrap_content"
        android:layout_height="wrap_content"
        android:background="@color/textbgcolor"
        android:text="@string/hello_first_fragment"
        app:layout_constraintBottom_toTopOf="@id/button_first"
        app:layout_constraintEnd_toEndOf="parent"
        app:layout_constraintStart_toStartOf="parent"
        app:layout_constraintTop_toTopOf="parent" />

    <Button
        android:id="@+id/button_first"
        android:layout_width="wrap_content"
        android:layout_height="wrap_content"
        android:text="@string/next"
        app:layout_constraintBottom_toBottomOf="parent"
        app:layout_constraintEnd_toEndOf="parent"
        app:layout_constraintStart_toStartOf="parent"
        app:layout_constraintTop_toBottomOf="@id/textview_first" />

    <Button
        android:id="@+id/button"
        android:layout_width="wrap_content"
        android:layout_height="wrap_content"
        android:layout_marginStart="72dp"
        android:text="Left"

        app:layout_constraintBottom_toBottomOf="parent"
        app:layout_constraintStart_toStartOf="parent"
        app:layout_constraintTop_toTopOf="parent"
        app:layout_constraintVertical_bias="0.184" />

    <Button
        android:id="@+id/button2"
        android:layout_width="wrap_content"
        android:layout_height="wrap_content"
        android:text="Right"
        app:layout_constraintBottom_toBottomOf="parent"
        app:layout_constraintEnd_toEndOf="parent"
        app:layout_constraintHorizontal_bias="0.49"
        app:layout_constraintStart_toEndOf="@+id/button"
        app:layout_constraintTop_toTopOf="parent"
        app:layout_constraintVertical_bias="0.184" />
</androidx.constraintlayout.widget.ConstraintLayout>


The layout as it appears in Android Studio


Varanasi Software Junction: Android Studio Layout

Varanasi Software Junction: Android Studio Layout


Here is the code of first_fragment.xml


<?xml version="1.0" encoding="utf-8"?>
<androidx.constraintlayout.widget.ConstraintLayout xmlns:android="http://schemas.android.com/apk/res/android"
    xmlns:app="http://schemas.android.com/apk/res-auto"
    xmlns:tools="http://schemas.android.com/tools"
    android:layout_width="match_parent"
    android:layout_height="match_parent"
    android:background="@drawable/layoutbackground"
    tools:context=".FirstFragment">

    <TextView

        android:id="@+id/textview_first"
        android:layout_width="wrap_content"
        android:layout_height="wrap_content"
        android:background="@color/textbgcolor"
        android:text="@string/hello_first_fragment"
        app:layout_constraintBottom_toTopOf="@id/button_first"
        app:layout_constraintEnd_toEndOf="parent"
        app:layout_constraintStart_toStartOf="parent"
        app:layout_constraintTop_toTopOf="parent" />

    <Button
        android:id="@+id/button_first"
        android:layout_width="wrap_content"
        android:layout_height="wrap_content"
        android:text="@string/next"
        app:layout_constraintBottom_toBottomOf="parent"
        app:layout_constraintEnd_toEndOf="parent"
        app:layout_constraintStart_toStartOf="parent"
        app:layout_constraintTop_toBottomOf="@id/textview_first" />

    <Button
        android:id="@+id/button"
        android:layout_width="wrap_content"
        android:layout_height="wrap_content"
        android:layout_marginStart="72dp"
        android:text="Left"

        app:layout_constraintBottom_toBottomOf="parent"
        app:layout_constraintStart_toStartOf="parent"
        app:layout_constraintTop_toTopOf="parent"
        app:layout_constraintVertical_bias="0.184" />

    <Button
        android:id="@+id/button2"
        android:layout_width="wrap_content"
        android:layout_height="wrap_content"
        android:text="Right"
        app:layout_constraintBottom_toBottomOf="parent"
        app:layout_constraintEnd_toEndOf="parent"
        app:layout_constraintHorizontal_bias="0.49"
        app:layout_constraintStart_toEndOf="@+id/button"
        app:layout_constraintTop_toTopOf="parent"
        app:layout_constraintVertical_bias="0.184" />
</androidx.constraintlayout.widget.ConstraintLayout>

Now add a click listener in FirstFragment.kt

package com.varanasisoftwarejunction.mykotlinproject

import android.os.Bundle
import androidx.fragment.app.Fragment
import android.view.LayoutInflater
import android.view.View
import android.widget.TextView
import android.view.ViewGroup
import android.widget.Button
import androidx.navigation.fragment.findNavController

/**
 * A simple [Fragment] subclass as the default destination in the navigation.
 */
class FirstFragment : Fragment() {

    override fun onCreateView(
            inflater: LayoutInflater, container: ViewGroup?,
            savedInstanceState: Bundle?
    ): View? {
        // Inflate the layout for this fragment
        return inflater.inflate(R.layout.fragment_first, container, false)
    }

public fun f1(view:View)
{
val tv:TextView = view.findViewById<TextView>(R.id.textview_first)
    tv.text="I was clicked"
}
    override fun onViewCreated(view: View, savedInstanceState: Bundle?) {
        super.onViewCreated(view, savedInstanceState)
        view.findViewById<Button>(R.id.button).setOnClickListener {
            f1(view)
        }
        view.findViewById<Button>(R.id.button_first).setOnClickListener {
            findNavController().navigate(R.id.action_FirstFragment_to_SecondFragment)
        }
    }
}


Here is the output in n Android Phone.


Varanasi Software Junction: Android App Snapshot


Repository for this commit

Post a Comment

0 Comments

Me